

Materials
1 kg Stucco Fine, 9 g pigment iron oxide black, 17 g pigment Umbra green Cyprus. Tools: steel trowel or venetian trowel
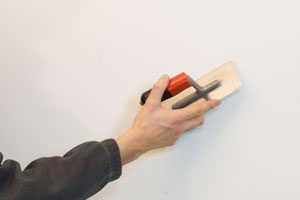
1. Prepare the substrate
- Priming with casein primer
- Filling with Lime Wall Finish -smooth-. Thin, even application in all directions with the steel trowel pulled out, so that if some structure remains from the filling, a random structure is created. Instead of grinding, it is usually enough to scrape with the trowel. The Lime Wall Finish -smooth- must dry for 24 hours.
 Slight burrs in the Lime Wall Finish -smooth- are scraped off.
2. First Layer
- The coloured Stucco Fine Render is applied very thinly in spots. Only a small amount of material is placed on the trowel.
- It is always applied alternately and smoothed to prevent burrs.
- The entire surface should be worked in 1m² sections diagonally over the surface.
- The first layer of the spot spatula application must not be pressed too hard. There should be no shine.
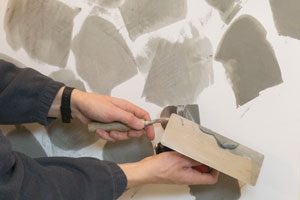 Work with only a little material on the trowel.
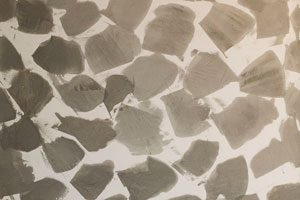 Spots drawn and smoothed in different directions.
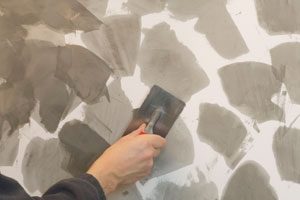 After the first patches have been applied, additional patches are placed in between.
 Third step, the last remaining spaces are covered.
 Thanks to the overlapping, the typical structure of a spot spatula application is created. The colours occur more evenly after drying.
3. Second Layer
- After the first layer is almost dry (brightly dried), the second layer can be applied.
- The second layer is applied in the same way as the first layer, but is more dense and strongly compressed at the end.
- To check whether all areas have been hit, the surface should always be viewed obliquely from the side.
- The best results are achieved when the second layer is filled very thinly.
4. Burnishing
- After the finished second layer has been tightened, the surface is pressed in all directions with the trowel edge and a little more pressure.
Application of the 2nd layer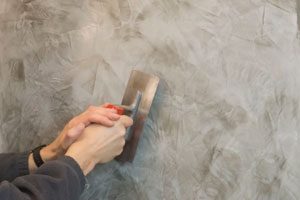 grouting
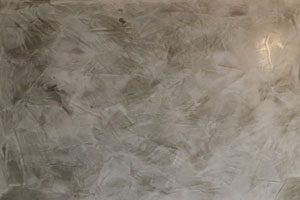
5. Soaping/ Burnishing
- Apply water-diluted Polishing Soap (1 part Polishing Soap + 6 parts water) with a brush and press immediately with a trowel. Work is again carried out in sections of approx. 1m².
- After each trowel pull, remove excess soap from the trowel blade with a cloth or sponge.
- It is burnished until the gloss is satisfactory.
- Stucco treated with Polishing Soap gets more shine and is water-repellent.
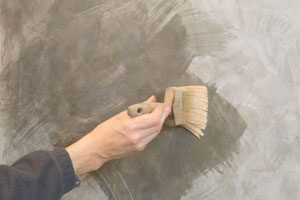 Apply the soap to parts.
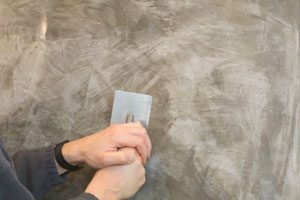 The soaped surface is grouted with pressure.
6. Notes / Tips
As always with surface designs you can also do something different than shown here.
- The first layer of Stucco Fine Render can also be filled over the entire surface. Maybe you will have a little less structure in the surface. This would then have to be a thin, even application that is pulled with the trowel in all directions to create a random structure.
- Interesting results, but with less gloss, can also be achieved with only one layer. Structures that are present in the substrate can then be pressed through particularly well. For example, the fine-grained appearance of well-smoothed Lime Wall Finish -fine-.
- Finally, by applying Punic Wax, more lustre and depth can be achieved in the surface.
- These instructions can be transferred to Stuccolustro. However, the layer thickness of Stuccolustro is slightly higher, resulting in longer waiting times between the work steps.
The information described above has been established in accordance with the most recent experience available to us. Due to the processing methods and environmental influences as well as the different types of substrates, a binding obligation for the general legal validity of the individual recommendations must be ruled out. Before use, the product must be checked by the processor for suitability for the intended use (sample coating).
In case of a new edition or product change, the texts lose their validity.